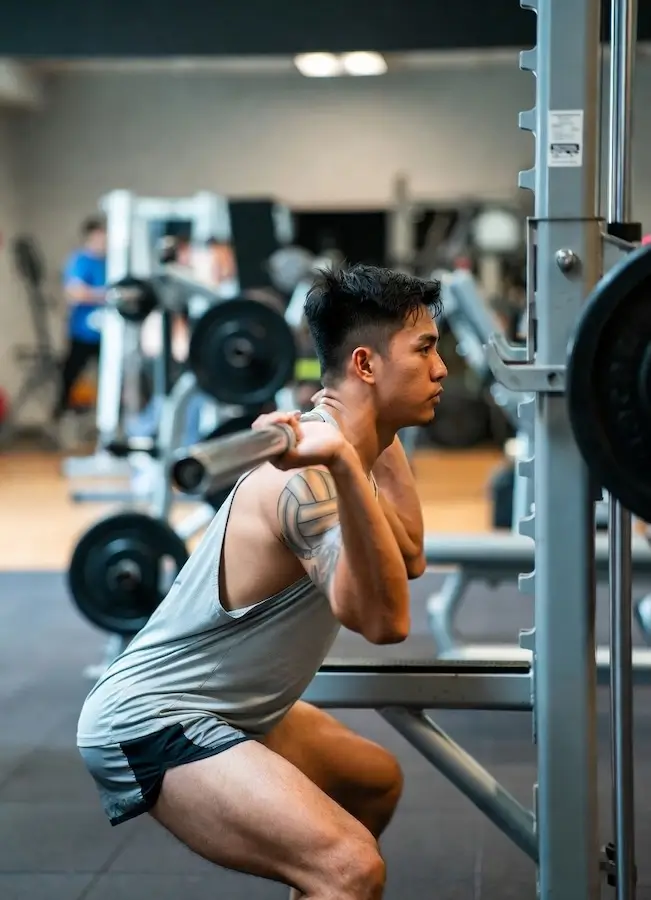
My sophomore year at Minnesota, I measured my standing vertical at 28 inches. Respectable for a high school outside hitter. Completely inadequate for college. Every middle blocker in our conference had at least four inches on me at the net, and I was losing swings I used to put away because the block was already there when my hand met the ball. My coach pulled me aside after the Great Lakes Regional and told me something I still repeat to players I train: “You have two options. Get taller, or get off the ground faster. Only one of those is trainable.”
That off-season, I followed a periodized vertical jump program built around strength-first progression and structured drill progressions that targeted triple extension and approach mechanics specifically. By November, my standing vertical sat at 34 inches. The six-inch difference didn’t just change my attack angle. It changed which rotations my coach trusted me in.
The same program principles apply whether you’re a high school player trying to make varsity or a club athlete chasing a college roster spot. Dedicated training that combines strength development, explosive power work, and sport-specific plyometrics can add 4 to 6 inches to your vertical within 8 to 12 weeks. Here’s the complete breakdown.

Why is a Higher Jump Important in Volleyball?
Vertical jump determines what you can do above the net. That sounds obvious, but most players don’t think about how those extra inches compound across every contact.
When you attack, a higher contact point opens angles that are physically impossible from a lower position. Going from a 28-inch to a 34-inch vertical increased my hitting velocity from 55 mph to 62 mph because the steeper downward angle gave me a longer arm swing path. The ball was crossing the net at a trajectory blockers couldn’t seal. That velocity increase directly correlates to what you’ll see in your volleyball spike mechanics because approach speed and contact height are the two biggest variables controlling power. If you track your attacking efficiency before and after a vertical training cycle, the kill percentage jump is measurable within weeks.
Blocking works the same way in reverse. A middle blocker at the net jumping 36 inches versus 32 inches covers four additional inches of airspace. That’s the difference between a tool off your hands and a clean stuff block. Higher-jumping blockers also get to cheat their timing because they know they’ll reach the ball even if they read late. At standard net height (2.43m for men, 2.24m for women), every inch of vertical reach directly translates to tighter coverage and more deflections.
The training that builds vertical leap also improves your defensive skills. Strength, explosiveness, and the ability to change direction quickly all develop together. Across every position-specific role on the court, vertical ability is a multiplier. An outside hitter jumping 32 inches instead of 26 is dangerous in all six rotations, including back-row attack positions that shorter verticals make impossible.
The Science of Jumping Higher: Why Training Works
How your body creates jumping power
Every vertical jump runs on the same biomechanical sequence, and understanding that sequence matters because it tells you what to train and why.
The cycle starts with the stretch-shortening cycle (SSC). When you bend your knees during your countermovement, the muscles in your quads, glutes, and calves stretch under load like a rubber band pulling taut. Your nervous system detects that stretch and triggers an automatic contraction that catapults you upward. This elastic recoil contributes more force to your jump than raw muscular strength alone, and the speed of that reflex response is highly trainable.
The actual launch is called triple extension: your ankles, knees, and hips fire simultaneously in a coordinated chain. When those three joints synchronize, you produce maximum force. When one fires early or late, power leaks. This is why athletes with strong legs but poor coordination still don’t jump well. The nervous system coordination matters as much as the raw muscle.
Your fast-twitch muscle fibers handle the explosive part. These are the fibers that contract fast and hard but fatigue quickly. Plyometric training specifically teaches your nervous system to recruit more of these fibers and to recruit them faster. That recruitment speed is called rate of force development (RFD), and it’s the single metric that separates good jumpers from exceptional ones.
The training equation: Power = Force × Velocity.
You can increase force through heavy strength training (squats, deadlifts) or increase velocity through plyometric training (box jumps, depth jumps). Programs that combine both produce the best results. A meta-analysis published in the Journal of Strength and Conditioning Research found that plyometric training alone generates 4.7 to 8.7 percent vertical jump improvements over 10 to 12 weeks, with combined programs producing even larger gains.
That’s why this 12-week program structures your training into distinct phases: build force capacity first, then train your nervous system to apply that force explosively.
Measure your baseline first
You need a starting number. Without it, you’re guessing at progress.
The Vertec device is the gold standard for testing. Stand underneath, reach as high as possible with one arm extended, and mark the highest vane you touch. Jump and mark the highest vane at peak reach. The gap between standing reach and jump reach is your vertical.
If you don’t have access to a Vertec, the chalk-and-wall method works well enough for tracking progress. Stand sideways against a wall, reach up and mark with chalk, then jump and mark again at peak height. Measure the gap. Repeat three times and take your best measurement.
Jump mats calculate your vertical from flight time. These are increasingly available at college facilities and training centers.
Here’s the measurement most testing completely misses: you need both your standing vertical and your approach vertical. Your standing vertical measures raw explosive power from a static position. This is what you use on block jumps, where you don’t have a running start. Your approach vertical measures your ability to convert horizontal momentum into height through a volleyball-specific approach step using regulation court dimensions as your runway.
Middle blockers rely almost entirely on standing vertical because they’re reading and reacting with minimal movement before the jump. Outside hitters and opposites generate their peak height from approach verticals. If you only test one, you’re missing half the picture. I call this gap “The Launch Differential,” and it tells you exactly where your training needs to focus. A player with a 30-inch standing vertical and a 32-inch approach has poor momentum conversion. A player with a 28-inch standing vertical and a 36-inch approach has excellent approach mechanics but needs raw strength work.
Volleyball-Specific Benchmarks:
These numbers reflect NCAA competitive standards and data from college recruiting assessments. Use them to gauge where you stand today.
| Position | Competitive level | Typical vertical jump |
|---|---|---|
| Outside hitter | Collegiate | 30-34 inches |
| Middle blocker | Collegiate | 33-37 inches |
| Opposite hitter | Collegiate | 32-36 inches |
| Setter | Collegiate | 24-30 inches |
| Outside hitter | Elite / Pro | 33-38 inches |
| Middle blocker | Elite / Pro | 35-40+ inches |
For context on how peak height and vertical leap interact at the college level: a 5’10” outside hitter with a 34-inch vertical reaches the same contact point as a 6’1″ hitter with a 28-inch vertical. Shorter players with trained verticals can absolutely compete, but they need to prioritize jump training differently than taller athletes who already have natural reach advantage.
Test every 3 weeks throughout the program. You should see 0.5 to 1 inch of measurable gain every 3 to 4 weeks when training is progressing properly.
Foundation phase: build strength before speed
Most athletes skip this. They want box jumps and depth drops on day one. I understand the impulse, but jumping into plyometrics without a strength base is how you end up with patellar tendinitis by week four instead of results by week twelve.
Your muscles need raw force capacity before you can train them to apply that force explosively. Think of it like this: if your max squat is 135 pounds, your nervous system has a limited pool of force to work with during a jump. Increase that squat to 225 pounds, and the same explosive training produces dramatically higher output because there’s more force available to accelerate.
Pair this foundation work with conditioning work for volleyball on your off days. Light court movement, footwork patterns, and low-intensity agility work keeps your sport-specific movement sharp while your strength base builds.
Squats
Stand with feet shoulder-width apart. Load the barbell across your upper back, not your neck. Lower your body by pushing your hips back and bending your knees until your thighs are parallel to the ground. Keep your back straight and your weight in your heels. Drive up through your feet and squeeze your glutes at the top.
Start with 3 sets of 8 reps at a weight where you can maintain form through every rep. Add 5 to 10 pounds each week.
Why this matters for volleyball: the squat is the most direct strength builder for triple extension. Every inch of depth you achieve under load directly corresponds to force production during your countermovement.
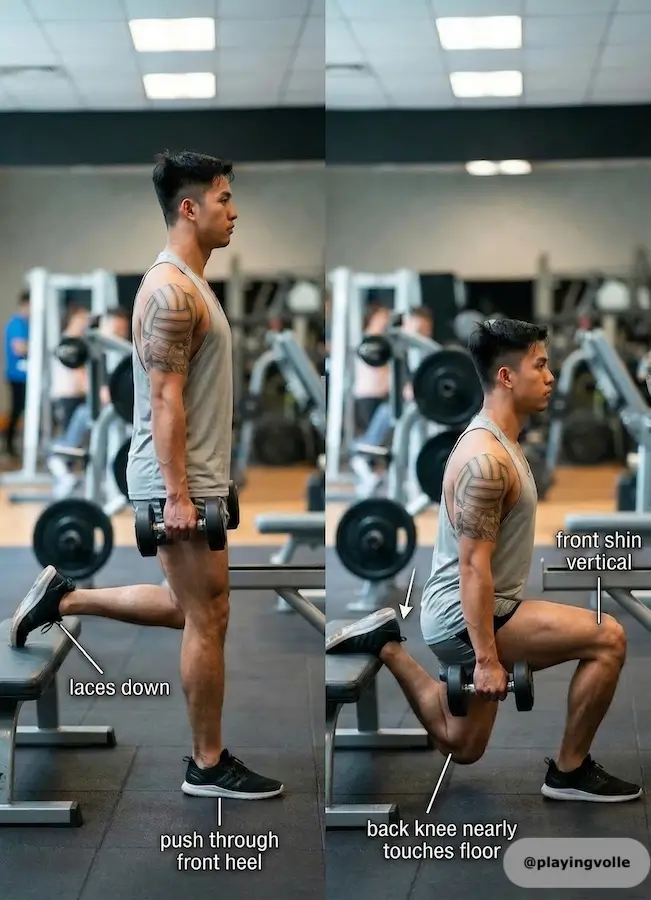
Bulgarian Split Squats
Stand facing away from a bench or box. Place one foot on the bench behind you, laces down. Hop your front foot forward until your front shin stays roughly vertical at the bottom of the movement. Lower yourself by bending the front knee until your back knee barely touches the ground. Push through the heel of your front foot to stand back up.
Complete 3 sets of 8 per leg.
Volleyball-specific benefit: This exercise does something squats alone can’t: it builds single-leg stability and identifies strength imbalances between your legs. Volleyball approach jumps load one leg more heavily than the other during the penultimate step. If your left leg produces less force than your right, your approach vertical suffers on one side and your landing mechanics become asymmetrical. This is along with the sideways moves and jumps, you go through.
Romanian deadlifts
Stand holding a barbell at hip height with an overhand grip. Push your hips back and lower the bar along your legs, keeping a flat back, until you feel a deep stretch in your hamstrings. Drive your hips forward to stand back up.
Complete 3 sets of 8 reps at moderate weight.
This targets the posterior chain (hamstrings, glutes, lower back) that generates the hip extension component of your jump. Weak hamstrings are the number-one predictor of knee injury in jumping athletes, so this exercise does double duty: performance and protection.
Calf raises
Stand on the edge of a step or raised platform with your heels hanging off. Rise onto your toes, hold for two seconds at the top, then lower slowly until your heels drop below the platform. The slow lowering phase (eccentric) matters more than the rising phase for building the tendon strength that protects against patellar tendinitis.
Start with 3 sets of 15 bodyweight reps. Progress to holding dumbbells by week 3.
Nordic hamstring curls
Kneel on a pad with your feet anchored under something solid (a bench, a partner’s hands, a loaded barbell). With your body straight from knees to shoulders, slowly lower yourself toward the ground by extending at the knees. Resist gravity for as long as possible, using your hands to catch yourself at the bottom, then push back up to the kneeling position.
Complete 2 sets of 4 reps. The eccentric (lowering) portion is the entire point. Nordic curls reduce hamstring injury rates by over 50% in athletes who perform them regularly, and they build the eccentric hamstring strength that protects your ACL during jump landings.
Strengthening Your Core
Your core transfers force between your lower body and your arm swing during the jump. If your midsection collapses under load, power leaks through the chain.
Planks (3 sets of 30-45 seconds), dead bugs (3 sets of 10 per side), and Pallof presses (3 sets of 10 per side) train the anti-rotation and bracing patterns that keep your torso rigid during explosive movements. Skip the crunches. They don’t train the stabilization pattern your body actually uses during a vertical jump.
Weeks 1-4: what to expect
Train 2 days per week on non-consecutive days. Rest 2 to 3 minutes between sets. Each session takes 45 to 50 minutes.
By week 4, your squat numbers should be noticeably higher and your single-leg stability should feel solid. Your vertical might improve 0 to 1 inch during this phase. That’s normal. The foundation work isn’t sexy, but skipping it caps everything that follows.
Power development phase (weeks 5-8)
Now you start teaching your nervous system to use that new strength explosively.
Hang cleans
Start with the barbell at mid-thigh. Dip your knees slightly, then explosively extend your hips and shrug the bar upward, pulling your elbows high and catching the bar at your shoulders in a front squat position. The movement is fast. If you can do it slowly, the weight is too heavy for this purpose.
Complete 5 sets of 3 reps. This teaches your body to produce maximum force in minimum time, which is exactly the neuromuscular pattern you need for a volleyball jump.
Jump squats
Squat down to parallel with a light barbell (30 to 40% of your back squat max) or just your bodyweight, then explode upward as high as possible. Land softly, reset your position, and repeat.
Complete 4 sets of 6 reps. Every rep should be maximum effort.
Medicine ball slams
Hold a medicine ball overhead, rise onto your toes, then slam the ball into the ground as hard as you can. This trains the full-body power chain from fingertips to feet and reinforces the arm swing acceleration pattern you use during your volleyball approach.
Complete 3 sets of 8 reps.
Lateral skater hops
Stand on one leg and explosively hop sideways, landing on the opposite foot. Absorb the landing, pause for one second, and hop back. This trains the lateral power middle blockers use when sliding along the net and the directional change all players need in transition.
Complete 3 sets of 8 (4 per side).
Weeks 5-8: what to expect
Train 2 days per week (one power emphasis, one strength maintenance) or 3 days if you’ve been training consistently for more than a year.
Your strength maintenance day keeps your squat and deadlift work at 75 to 80% intensity with reduced volume (4 sets of 6 instead of the earlier 3 sets of 8). You’re maintaining the force base while layering speed on top.
Expect 1 to 2 additional inches of vertical improvement during this phase. Your jumps will start to feel different. The transition from countermovement to launch gets sharper. That’s your rate of force development improving.
Plyometric power phase (weeks 9-12)
The payoff arrives in the final four weeks. Your strength base is built, your nervous system knows how to recruit fast-twitch fibers, and now you train the stretch-shortening cycle to operate at maximum efficiency.
Countermovement jumps
Stand with feet shoulder-width apart. Dip into a quick countermovement and jump as high as possible, swinging your arms aggressively. Land softly, reset completely, and repeat. Every rep is a max-effort attempt.
Complete 5 sets of 3 reps. Test your height on the first rep of each set.
Box jumps
Stand in front of a box (18 to 20 inches to start). Dip and explode upward, landing on the box with both feet simultaneously. Step down (don’t jump down). The goal is maximum height and a soft, controlled landing.
Progress to 24 inches by weeks 11-12 if your landing mechanics are solid.
Complete 4 sets of 6 reps.
Depth jumps
Stand on a 12-inch box. Step off (don’t jump off). The instant your feet contact the ground, reverse direction and jump as high as possible. Minimize ground contact time. The brief moment between landing and jumping is where your stretch-shortening cycle does its work. Longer ground contact means you’re absorbing force instead of redirecting it.
Complete 4 sets of 4 reps. This is the most neurally demanding exercise in the program. Do not add volume.
Single-leg hops
Stand on one leg and hop forward for maximum distance, landing on the same foot. Stabilize, then hop again.
Complete 3 sets of 6 per leg. This builds the single-leg explosion you need for your penultimate step during approach jumps.
Volleyball-specific approach jumps
Set up on a volleyball court at your normal starting position for an outside approach. Execute your full approach (3-step or 4-step) and jump as high as possible, reaching with your hitting arm as if attacking a set. Focus on the penultimate step: your second-to-last step before takeoff is the longest and fastest step, and it’s where horizontal speed converts into vertical height.
The mechanics of this conversion are specific to volleyball. Basketball players jump off one foot from a sprint. Volleyball players use a two-foot plant after decelerating through that long penultimate step. Train both the 3-step approach (left-right-left for right-handed hitters) and the 4-step approach (right-left-right-left) because different sets and court positions require different approach angles.
Complete 4 sets of 4 approach jumps. Film yourself from the side. Watch whether your penultimate step is actually longer and lower than your final step. If both steps look the same length, your momentum conversion is inefficient.
Block jump drills
Stand at the net in a blocking position with your hands at forehead height. Without any approach, explode straight up and press your hands over the net. Land and immediately jump again. This trains the shortened countermovement pattern blockers actually use in matches.
Middle blockers should add a lateral shuffle before the block jump: start at the center of the net, shuffle two steps to the pin, and jump. This trains the lateral-to-vertical transition that makes slide blocking effective.
Complete 3 sets of 6 block jumps. Add the lateral shuffle variation for 3 sets of 4.
Weeks 9-12: what to expect
Total foot contacts per plyometric session: 85 to 100. Do not exceed this number. More is not better with plyometrics. Each contact is a max-effort neural event, and exceeding the volume threshold turns power training into endurance work.
Maintain one light strength session per week (3 sets of 5 on squats and deadlifts at 85% effort) to prevent strength decay.
Expect 2 to 3 additional inches of vertical improvement during this phase. Most athletes see their biggest single-session improvements between weeks 9 and 11, when the accumulated training adaptation from all three phases converges.
The deload principle
Every fourth week, cut volume by 40 to 50%. Perform the same exercises at the same intensity, but do 3 sets instead of 5 and 4 reps instead of 6. Your nervous system needs this recovery window to consolidate the adaptations from the previous three weeks.
This is not optional. Skipping deload weeks is how athletes plateau at week 6 and never reach the gains that should arrive in weeks 9-12.
Why volleyball jump training is different
I want to address something the generic “how to jump higher” guides miss entirely, because it matters for how you structure your training beyond this 12-week program.
Volleyball players jump 250 to 300 times per match. Basketball players average 40 to 60. That volume difference means volleyball training has to prioritize repeated explosive efforts and tendon durability over raw single-jump peak height. Your program needs to account for the fact that your 200th jump in a five-set match needs to look like your 10th.
The jump types are also fundamentally different. Attack jumps use a multi-step approach with horizontal-to-vertical momentum conversion. Block jumps use a shortened countermovement from a near-static position, often after lateral movement. A middle blocker might execute a lateral shuffle, plant, and jump twelve times in a single rally. Training only standing verticals or only approach jumps leaves half your game underdeveloped.
I call this the “Block Tax.” Every lateral step a middle blocker takes before jumping reduces their available vertical by 1 to 2 inches compared to a stationary block jump. If your training only builds peak vertical from a standing position, you haven’t accounted for the 15 to 20% of jump height you lose after moving laterally. Specific lateral-to-vertical transition drills (like the shuffle block jumps described above) reduce the Block Tax by training your body to redirect horizontal energy upward instead of absorbing it into the ground.
Recovery, injury prevention, and nutrition
The training creates the stimulus. Recovery is where your body actually adapts. Miss the recovery, and you’ve done hard work for nothing.
Patellar tendinitis: the volleyball player’s risk
Patellar tendinitis (jumper’s knee) is inflammation of the tendon connecting your kneecap to your shinbone. The repeated explosive loading from those 250-300 jumps per match creates cumulative stress that eventually breaks down the tendon if recovery doesn’t keep pace with training volume.
Prevention starts with the exercises already in this program. Romanian deadlifts and Nordic hamstring curls build eccentric strength in the structures that protect your knee joint. The calf raise protocol with slow eccentrics strengthens the Achilles tendon. And progressive training volume (gradually increasing plyometric contacts rather than jumping to maximum volume in week one) gives your tendons time to adapt alongside your muscles.
Landing mechanics matter as much as jump mechanics. Land on both feet simultaneously when possible. Keep your knees tracking over your toes, not caving inward (valgus collapse). Use a “soft” landing that distributes impact through your entire leg chain rather than concentrating force at the knee. Film yourself landing. If your knees buckle inward on any rep, reduce the intensity and focus on control before adding height or speed.
If knee pain develops during training, reduce plyometric foot contacts from your target to 40-50 per session and continue strength training at moderate intensity. Sharp, localized pain in the tendon requires professional evaluation. Dull soreness that resolves within 24 hours is normal training adaptation.
Consider investing in quality volleyball knee pads for your court sessions. They won’t prevent patellar tendinitis, but they protect against the impact-related knee bruising that makes athletes subconsciously alter their landing mechanics to avoid pain, which creates compensatory movement patterns that increase injury risk elsewhere.
Sleep and recovery protocols
Your muscles rebuild during sleep, not during training. Elite athletes across every sport consistently sleep 8 to 10 hours per night. If you’re training three days a week on this program and sleeping six hours, the training stress is accumulating without adequate repair time. You’ll plateau or regress.
Maintain 48 to 72 hours between lower-body plyometric sessions. On off days, light walking, easy stretching, and mobility work promote blood flow without adding training stress.
Nutrition for jump training
Protein drives muscle repair. Consume 0.7 to 1 gram per pound of bodyweight daily. For a 160-pound athlete, that’s 112 to 160 grams spread across your normal meals. No special supplements required.
Plyometric and strength training deplete muscle glycogen rapidly. Eat 30 to 40 grams of carbohydrate before training and 30 to 50 grams afterward to maintain glycogen stores and support recovery.
Hydration affects power output directly. Even 2% dehydration reduces strength and explosive performance. Monitor urine color: pale yellow means adequate hydration, dark yellow means you need more water before your next session.
Micronutrient deficiencies in iron, zinc, and magnesium impair recovery. A diet built around varied whole foods (vegetables, lean proteins, whole grains, fruit) covers these without supplementation for most athletes.
Your 12-week improvement timeline
Here’s what realistic progress looks like when you train consistently and recover properly:
| Phase | Weeks | Expected gain | Cumulative total |
|---|---|---|---|
| Foundation (strength) | 1-4 | 0-1 inch | 0-1 inch |
| Power development | 5-8 | 1-2 inches | 1-3 inches |
| Plyometric power | 9-12 | 2-3 inches | 4-6 inches |
A 4 to 6 inch improvement is realistic for an athlete who follows the program consistently, recovers properly, and progresses through the phases in order. Athletes with less training history often see gains at the higher end because untrained nervous systems respond quickly to new stimuli. Athletes with several years of strength training may see gains closer to 3 to 4 inches because their neuromuscular system is already partially adapted.
Beyond the raw inches, the training builds a system you can continue using. You know how to structure periodization, how to balance strength and power work, and how to train sport-specific movement patterns. These principles apply throughout your entire volleyball career.
The program connects directly to a broader systematic improvement plan for your overall game. Vertical ability is one piece. Court awareness, passing accuracy, and match fitness all develop alongside your jumping power when your training is structured correctly.
Now get out there and test it.
Keep spiking, Ryan Walker
FAQs
Two to three sessions per week with 48 to 72 hours between lower-body sessions. This frequency gives your nervous system enough stimulus to adapt while allowing full recovery between workouts.
On non-training days, you can still work on court skills like passing drill sessions or serving practice without interfering with your jump program.
A 4 to 6 inch gain is realistic over 12 weeks of structured training that progresses through strength, power, and plyometric phases in order. Individual results depend on your starting fitness level, training consistency, and recovery quality.
Athletes who have never done structured strength training tend to see larger gains because their baseline neuromuscular capacity has more room to improve.
No. Your muscles and tendons need recovery time between explosive sessions. Jumping every day leads to accumulated fatigue, diminished performance, and increased injury risk, especially patellar tendinitis. Train 2-3 days per week and let the recovery days do their job.
What is the difference between standing vertical and approach vertical?
Standing vertical measures your explosive power from a stationary position. It’s the jump you use for blocking. Approach vertical measures your height after a multi-step running approach, which is the jump you use for attacking. Most volleyball players have an approach vertical 4 to 8 inches higher than their standing vertical because the approach converts horizontal speed into additional height. Train both.
Do I need a gym to follow this program?
The strength phase (weeks 1-4) benefits significantly from barbell access for squats, deadlifts, and hang cleans. If you only have access to dumbbells or bodyweight, you can substitute goblet squats, single-leg deadlifts, and dumbbell jump squats. The plyometric phase (weeks 9-12) requires minimal equipment: a sturdy box for box jumps, a medicine ball, and a flat surface. Court access helps for the volleyball-specific approach jump and block jump drills.